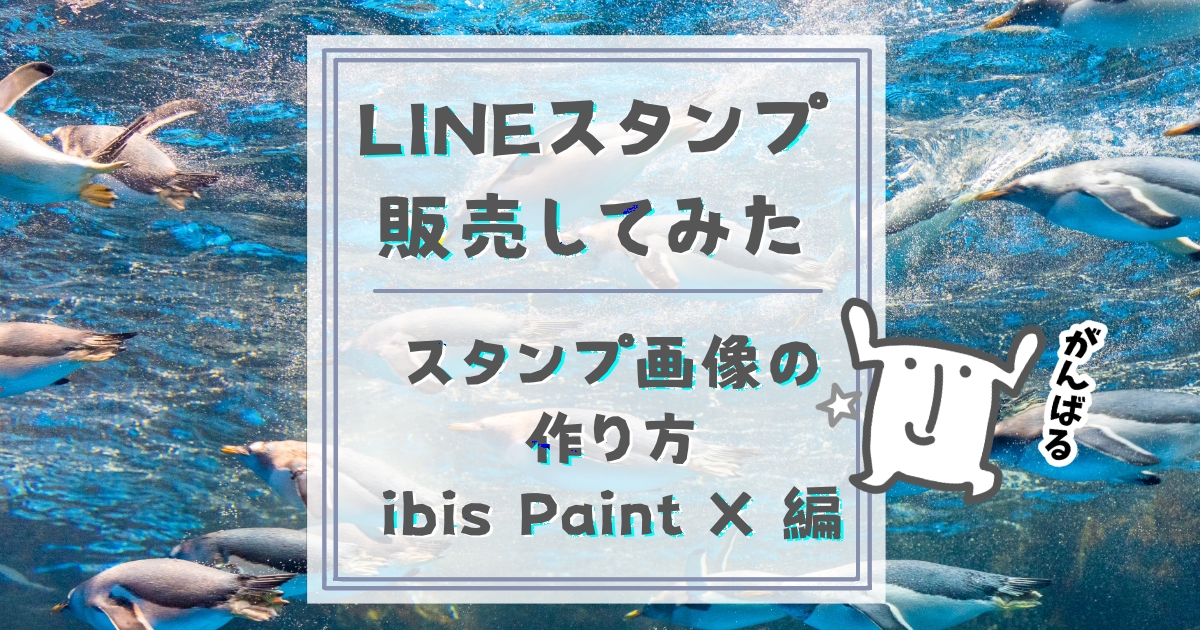
・LINEスタンプを販売してみたいけどスタンプの画像ってどうやって作るの?
・ibis Paint X (アイビスペイントX)を使ったスタンプ画像の作り方が知りたい!
という方へ向けた記事です。
記事の最後に“レイヤー機能がよくわからない”方へ向けたおまけコーナーもあります。
 ペンギン
ペンギンこんにちは投資するペンギンです
先日LINEスタンプの販売をはじめました。
前回はスタンプの販売方法をご紹介しましたが
今回はスタンプ画像の作り方編です。
ペンギンこれであなたもスタンプクリエイター!
3種類の画像を用意しよう
画像の種類とサイズ
スタンプを販売するにあたって、用意する画像は3種類あります。
 ケープさん
ケープさんスタンプの画像だけじゃないんだね
用意するのは以下の3種類。
- スタンプ画像
幅(最大)370×高さ(最大)320 - メイン画像
幅240×高さ240 - トークルームタブ画像
幅96×高さ74
ペンギンすべて、
解像度は72dpi以上
カラーモードはRGB
背景色は透明です
スタンプ画像とは
まさにスタンプとなる画像です。
メイン画像とは
販売する画面の先頭にどどーんと出る画像です。
ペンギンアイキャッチですね!
トークルームタブ画像
LINEのスタンプを選ぶところに出てくる画像です。
小さい画像なので、何のスタンプなのかが一目でわかりやすいように作りたいですね。
画像を ibis Paint X (アイビスペイントX)で作ってみよう


わたしはiPadでibis Paint Xというアプリを使ってスタンプを作っています。
ご自身の使いやすいアプリで大丈夫ですが、今回は ibis Paint X を使った作成方法をご案内します。
スタンプ画像の作成
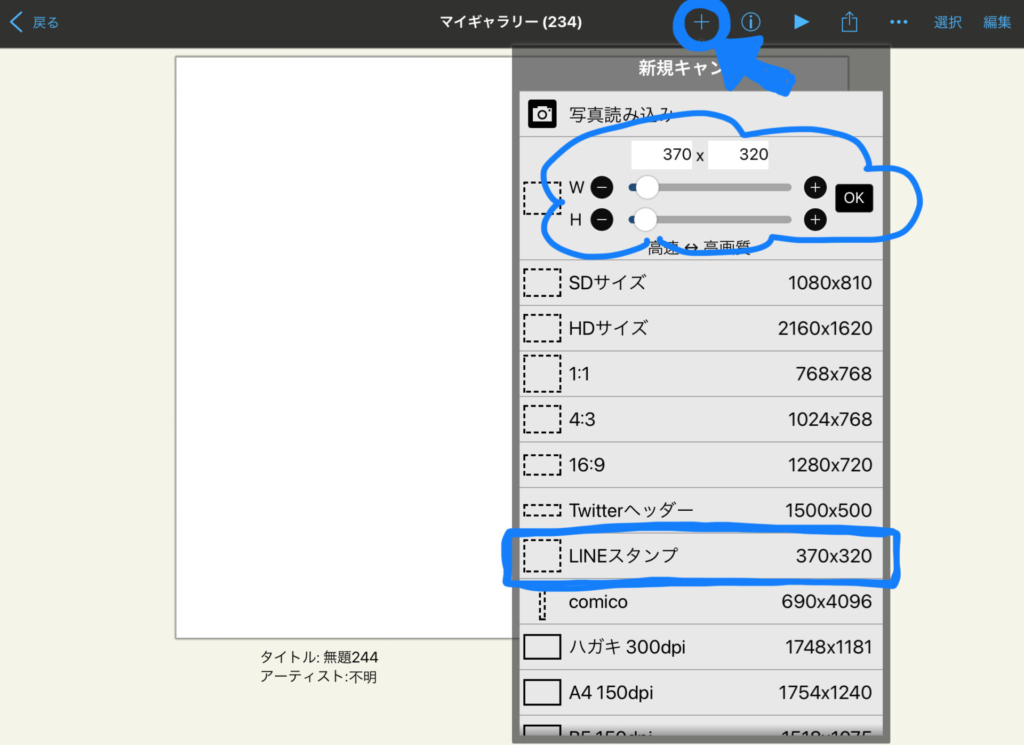
マイギャラリーから新規キャンバスを開きましょう。
なんと ibis Paint X にはすでにLINEスタンプというサイズが用意されています。
この370×320というサイズはスタンプの最大サイズなので、これより小さいサイズでも作ることができますがサイズが必ず偶数になるように設定してください。
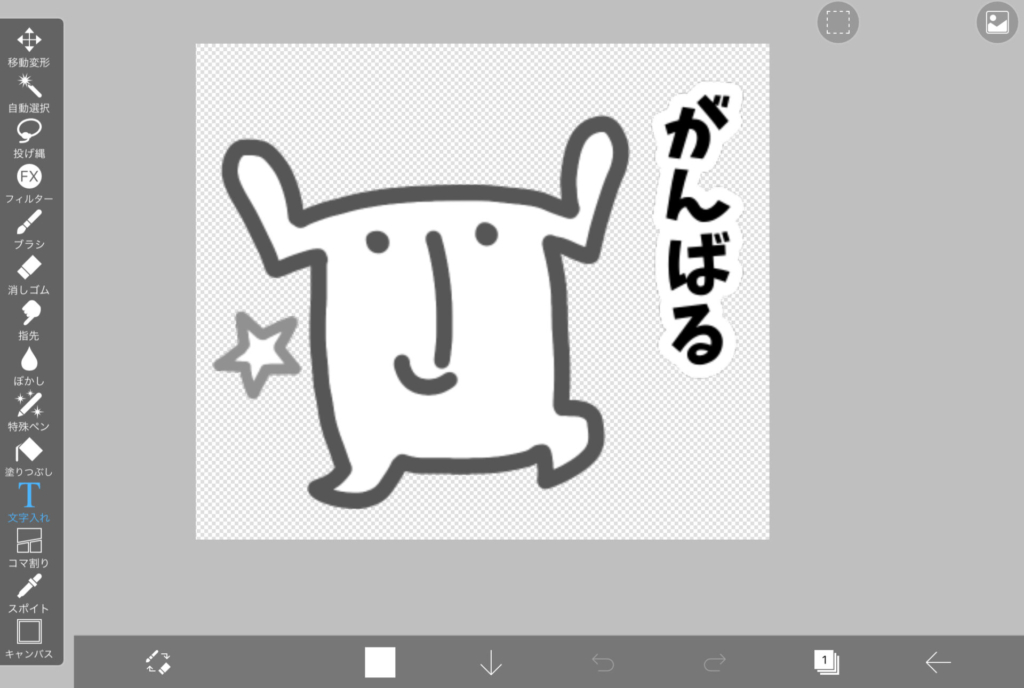 ペンギン
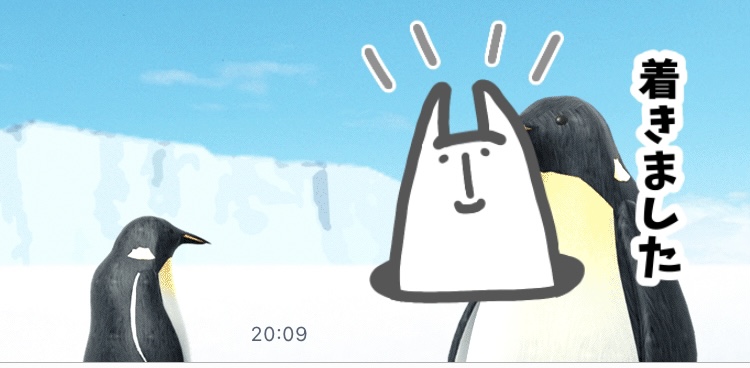
ペンギンこのような画像をつくってみるよ
作る前に少し、レイヤーについて。
レイヤーってよくわからない!難しい!という方もいますが、便利なのでぜひ使ってみてください。
ペンギンレイヤーについて、詳しくは後述します
ペンギンさっそく作っていくよ〜
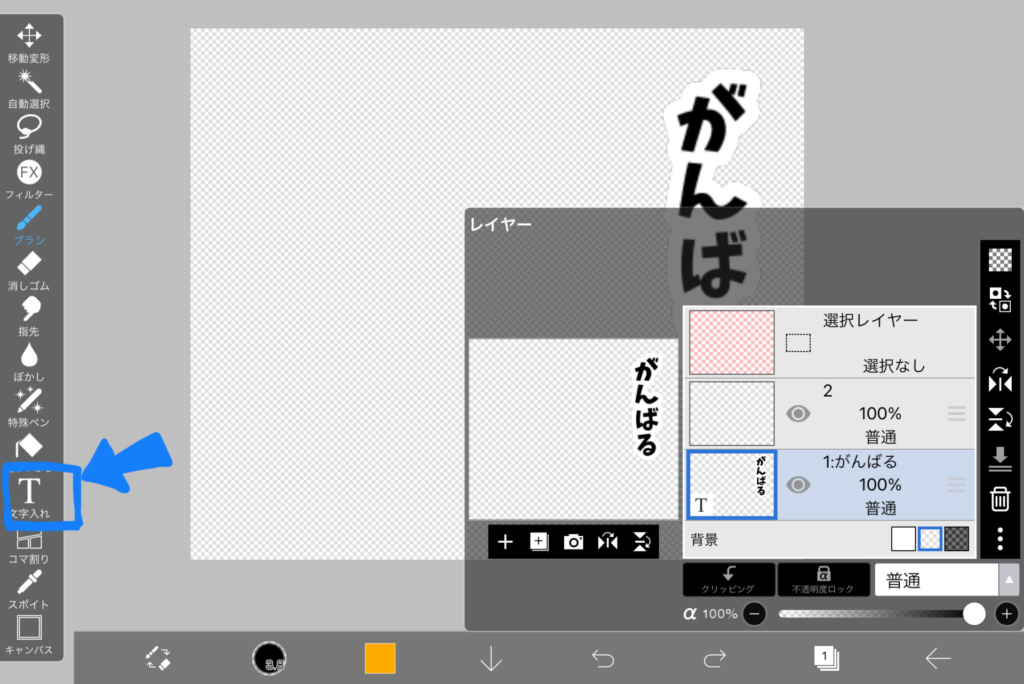
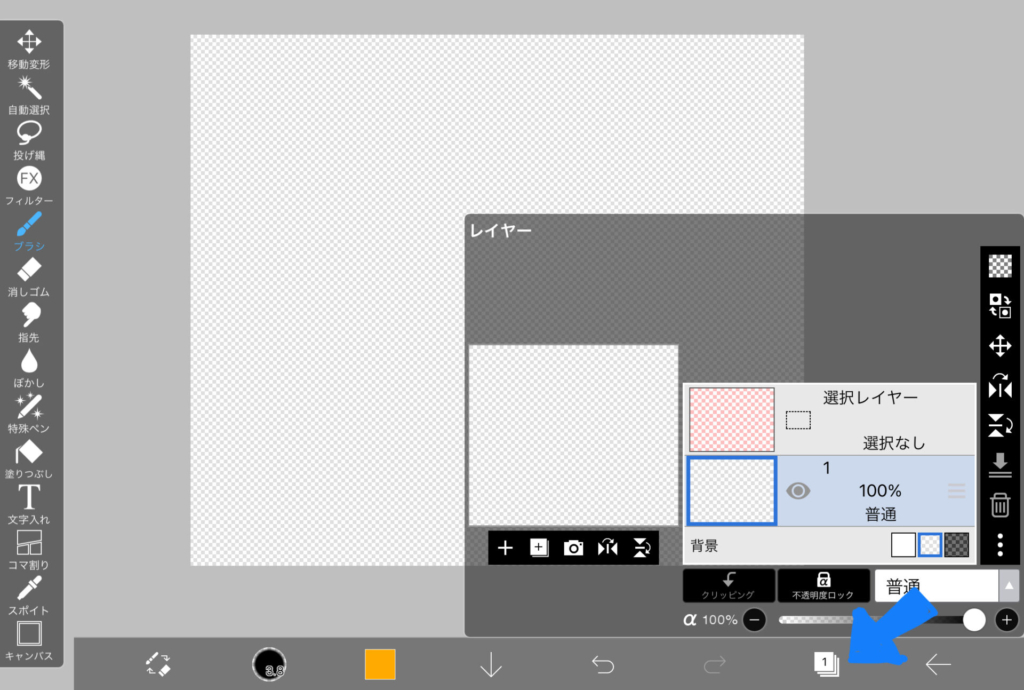
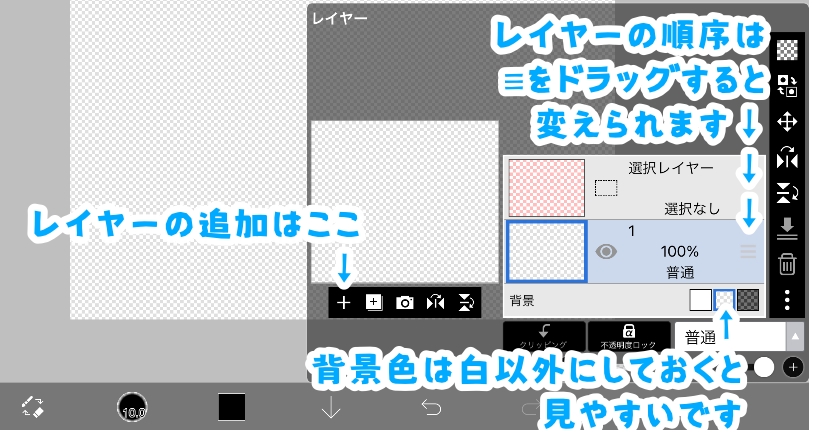
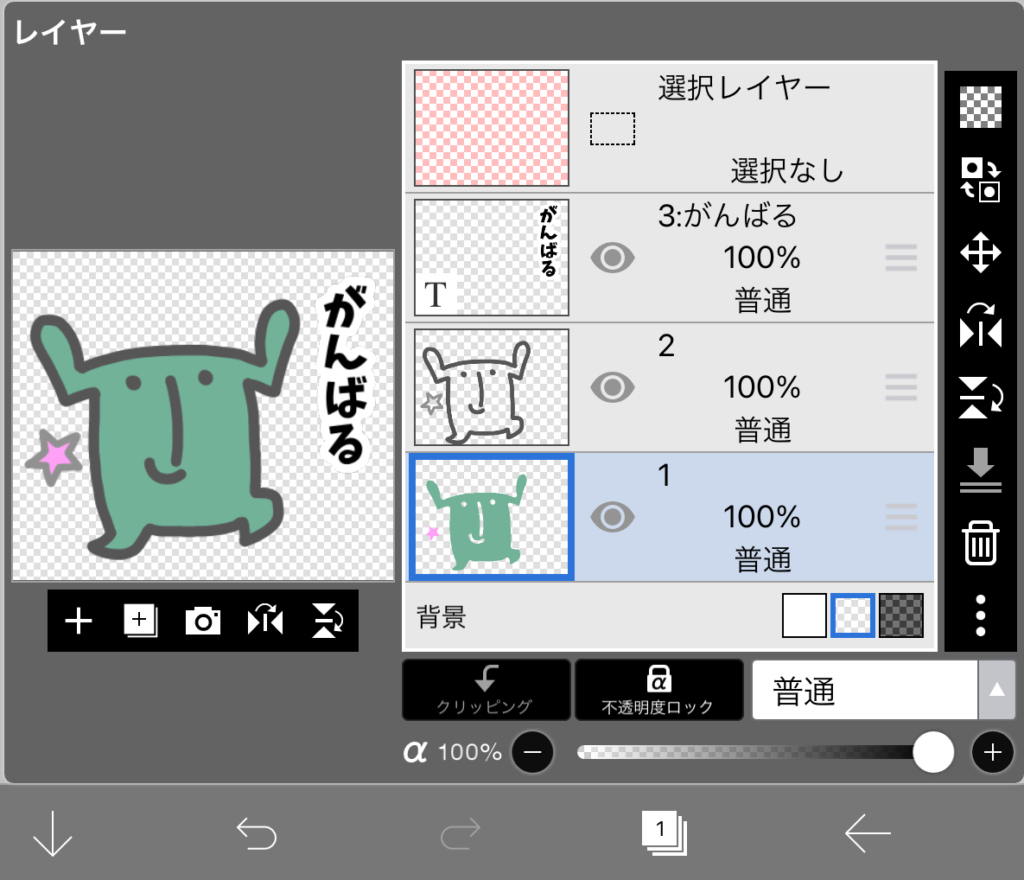
レイヤーを1枚追加して文字を入れます。
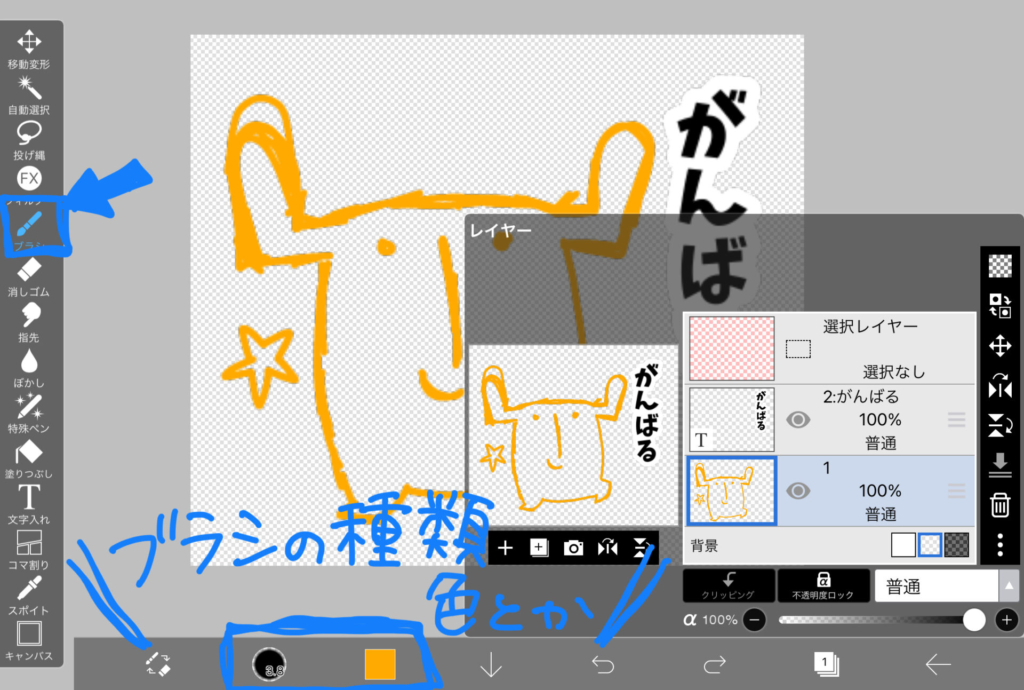
もう1枚には下書きを描きました。
主線と違う色だと後で作業がやりやすいです。
また、スタンプ画像はまわりに10ピクセル分の余白が必要です。
ペンギンサイズギリギリまで描かないようにしてね
ケープさんそれまぁまぁ重要事項だよね!?さらっと言うね!?
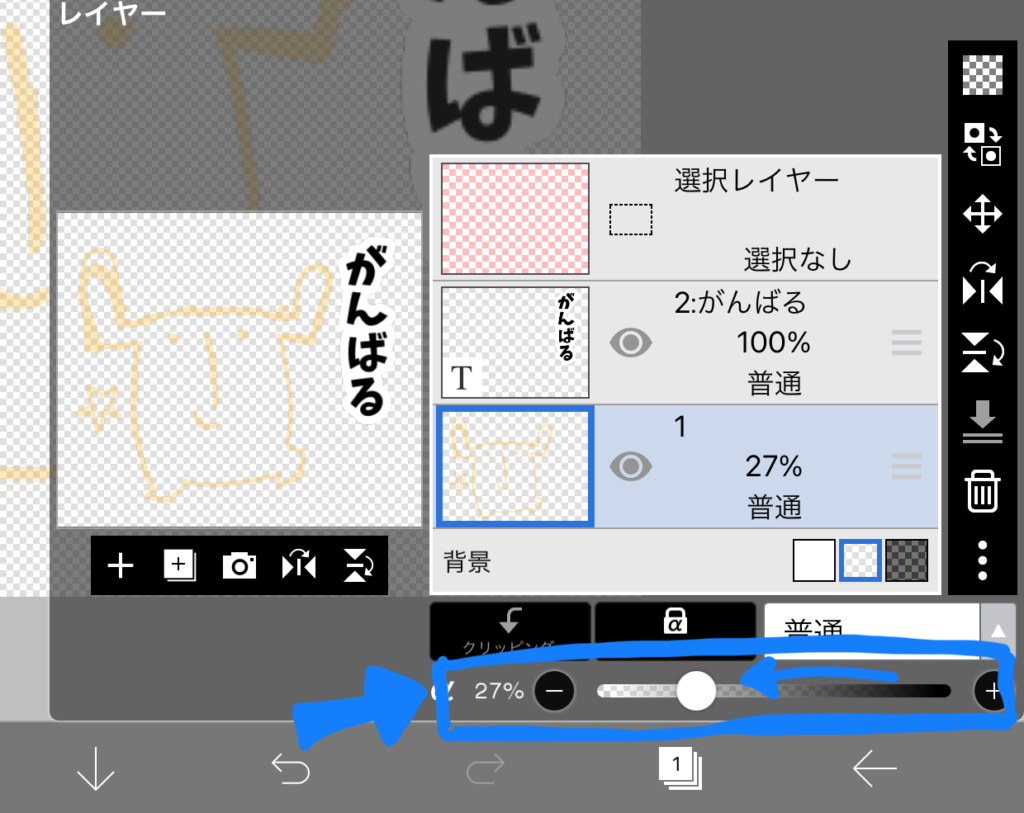
下書きを描いたレイヤーの不透明度を下げます。
ペンギン線が薄くなって、主線が描きやすい!
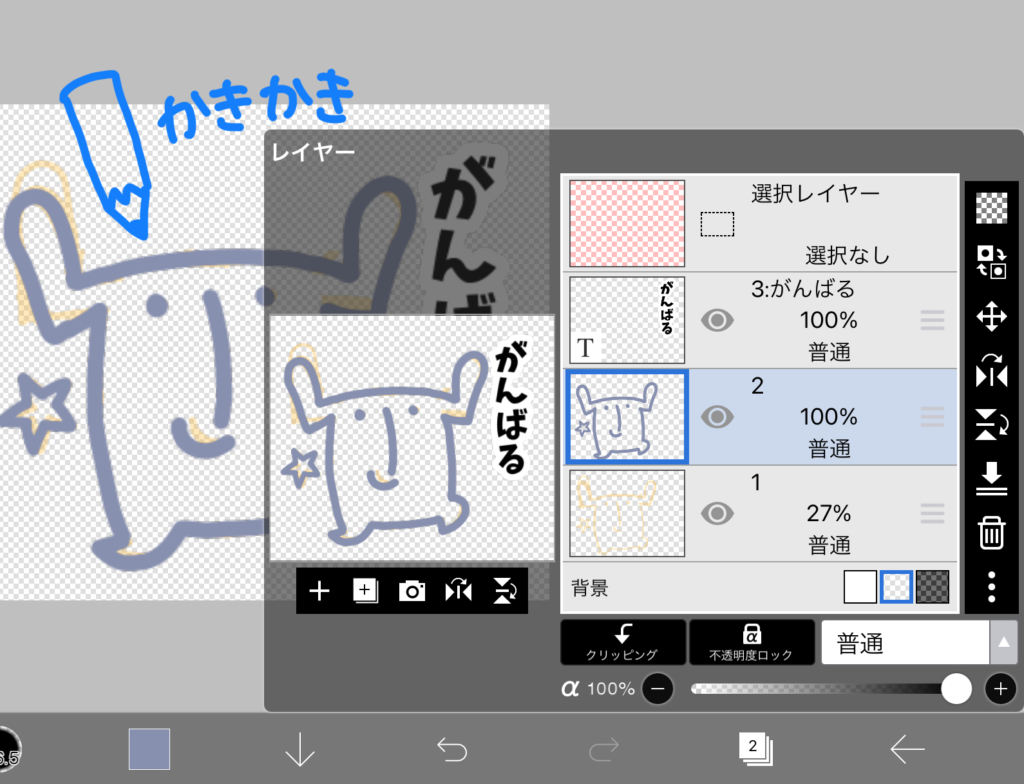
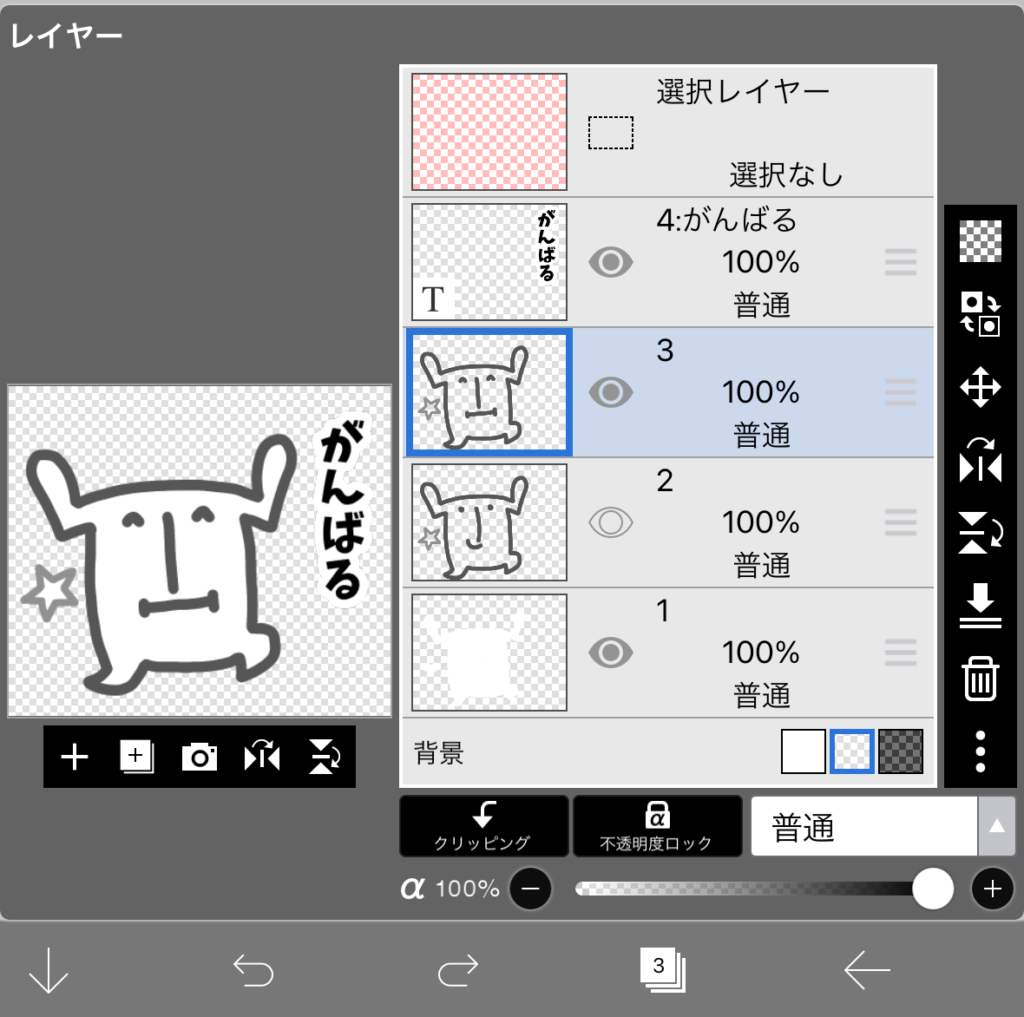
レイヤーを1枚追加して主線を描きました。
 ペンギン
ペンギンちなみにこれは主線の色を間違えたため後で描き直しています
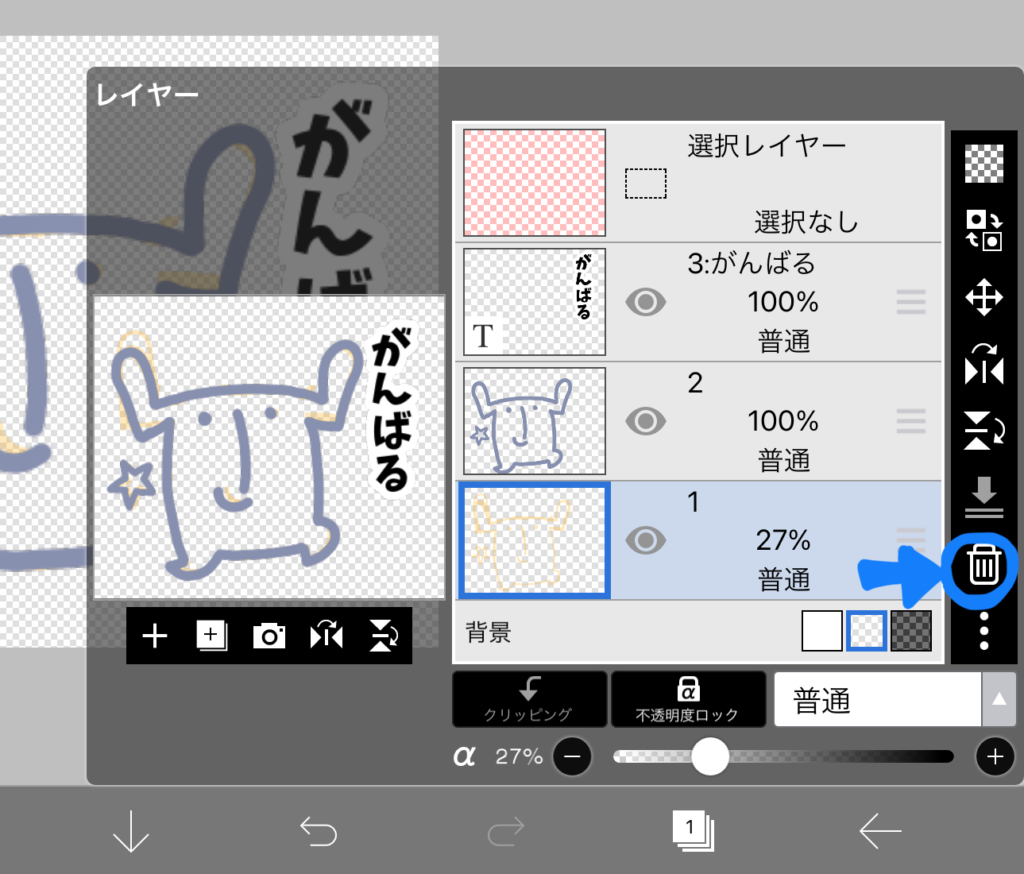
主線が描けたら下書きのレイヤーは消しちゃいます。
レイヤーを1枚追加して、色をつけていきます。
出来上がり!
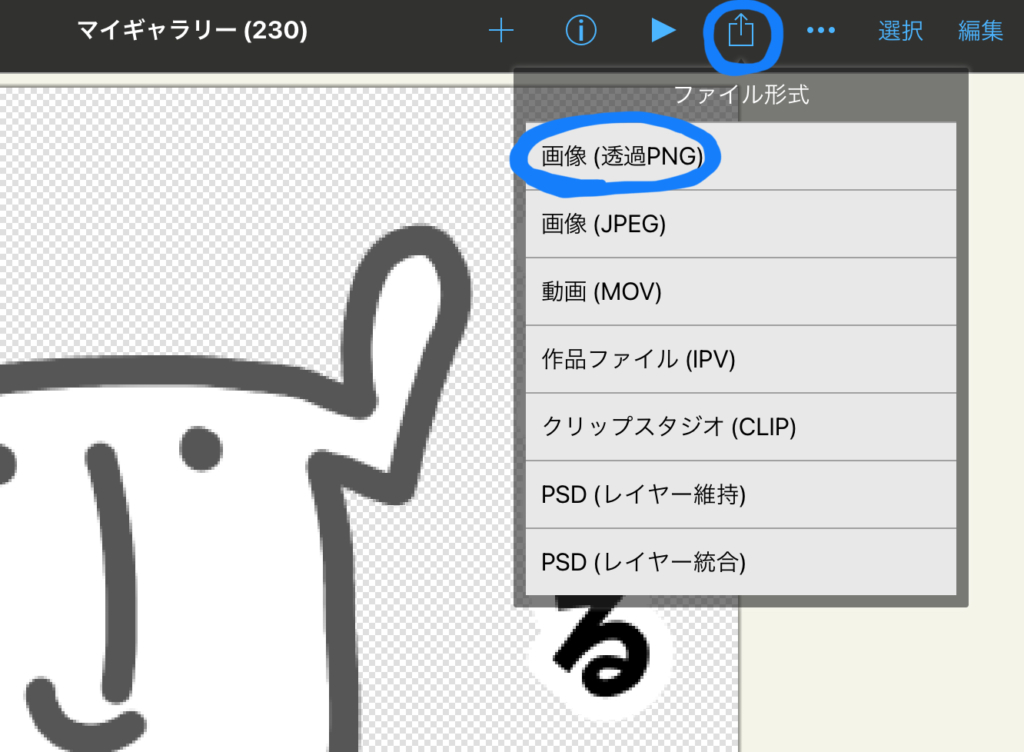
マイギャラリーに戻って画像を保存しましょう。
ファイル形式は画像(透過PNG)を選んでください。
ペンギンやったね
メイン画像の作成
メイン画像はLINEユーザーが最初に見る画像。
どのようなスタンプなのか一目でわかるようなものがいいですね。
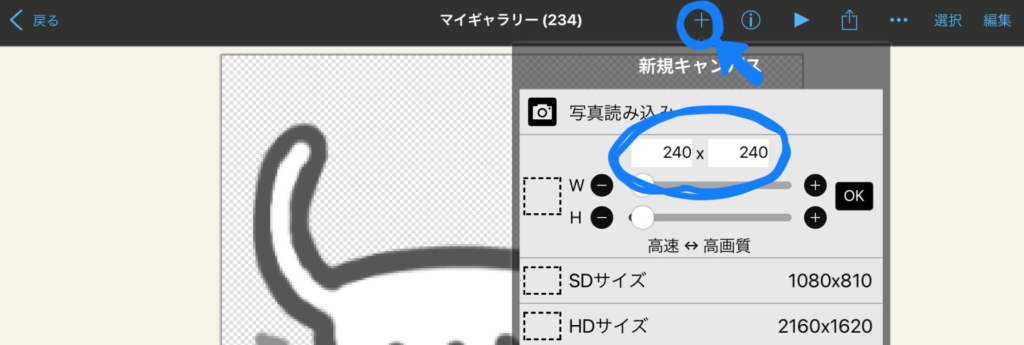
新規キャンバスで240×240に設定しましょう。
これ以降はスタンプ画像と一緒です。
トークルームタブ画像の作成
トークルームタブ画像もサイズだけ気をつけたら、あとはスタンプ画像と同じです。
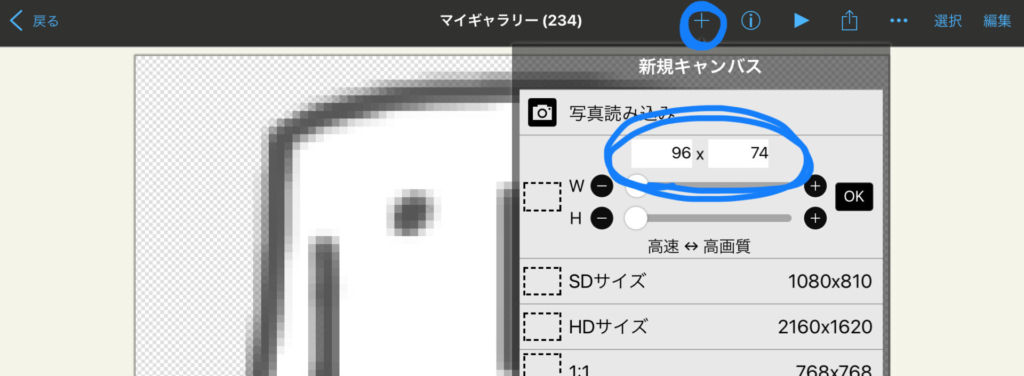
新規キャンバスのサイズは幅96×高さ74です。
ペンギンこれで3種類の画像ができあがりました!
スタンプのファイル名
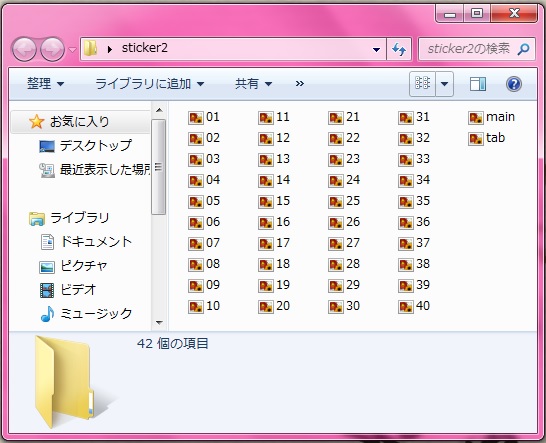
ファイル名をつけるのはパソコンで作業したほうがやりやすいので、いったんすべての画像をパソコンに移しました。
スタンプ画像は01〜40
(スタンプが40個の場合)
メイン画像はmain
トークルームタブ画像はtab
というファイル名をそれぞれ付けましょう。
ケープさんスタンプ画像の数は8、16、24、32、40個の中から選べるよ
ペンギン8個の場合はファイル名を01〜08にしてね
実はファイル名は自由につけても良いのですが、上記のようにつけておくことでアップロードが一括でできるので時短になります。
ペンギンZIPファイルでぽぽーんとアップできるよ
画像のアップロードについては別の記事にまとめています。
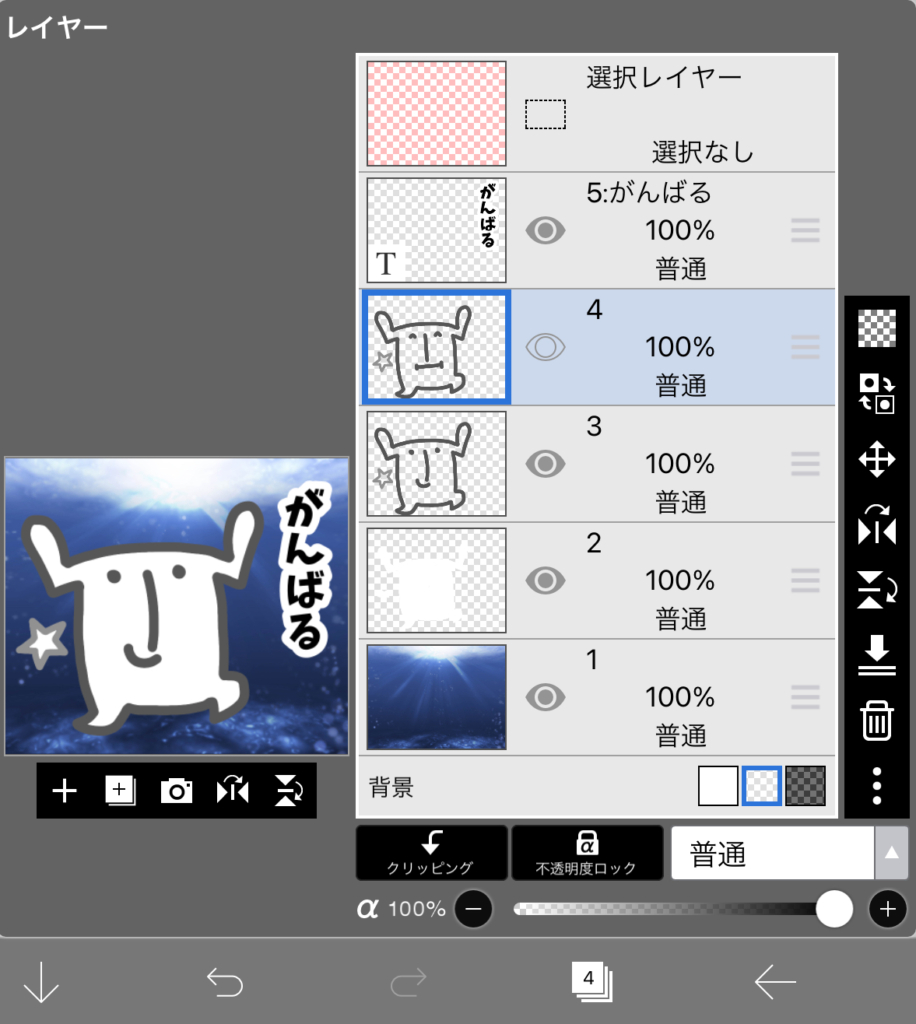
おまけ:レイヤーについて
ibis Paint X に限らずPhotoshopなどにもあるレイヤー機能について、よくわからない方へのおまけコーナー!
ペンギンもともとレイヤーを使いこなしている人には何の収穫もないコーナーだよ
ケープさん言い方な
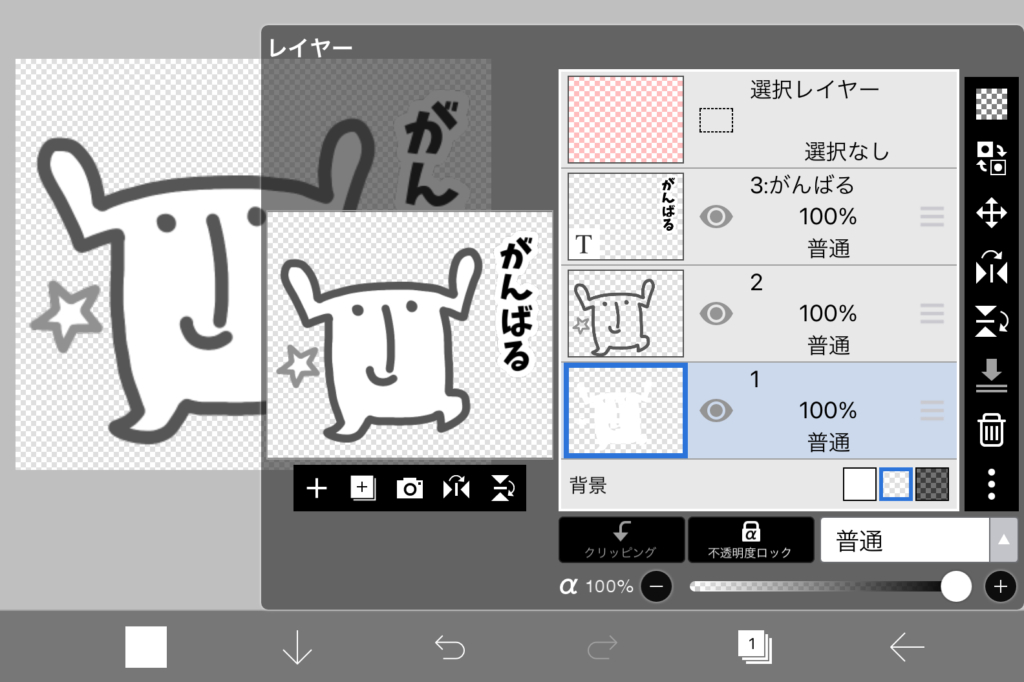
\レイヤーのイメージ/
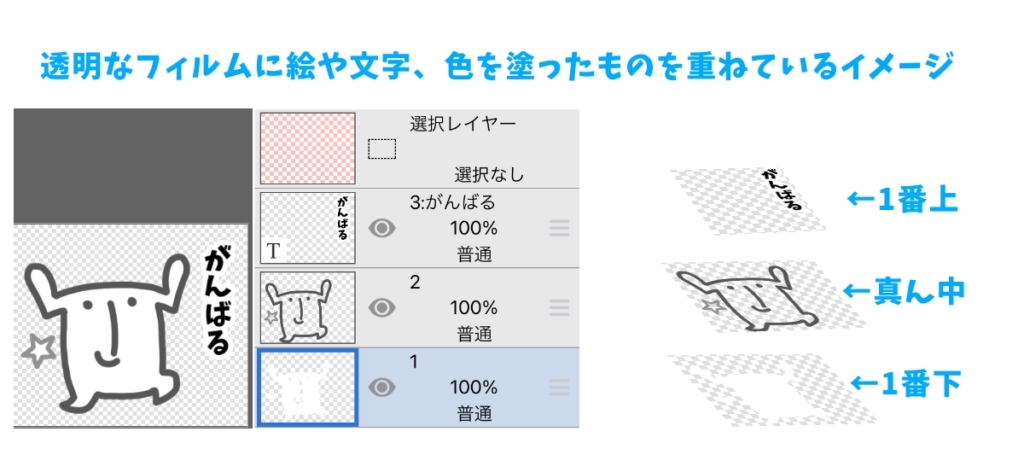
今回作ったスタンプ画像を分解してみました。
これは3枚の画像を重ねて出来ています。
 ヒゲさん
ヒゲさん1枚にまとめて描いたらいいのに、3枚別々に描くメリットってあるの?
めんどくさいだけじゃない?
ペンギンいくつかのメリットを挙げてみるよ
メリットその1!
色の変更がしやすい
主線はそのままに、色を塗ったレイヤーだけ塗り直すことができます。
主線に影響がでることなく色の変更ができます。
メリットその2!
主線も変更しやすい
主線を描いたレイヤーを複製することで、最初の主線を残したまま新たな絵を描くことができます。
これはLINEスタンプ作成にはかなり便利!
メリットその3!
背景をいじりやすい
一番下に新規でレイヤーを作ることで簡単に背景をつけられます。
雰囲気がガラッと変わりますね。
ケープさんLINEスタンプにする場合は周囲に余白が10ピクセル分必要なのでご注意を。
メリットその4!
絵の上に絵が描ける
しかく氏にメガネをかけさせてみました。
このように元の絵を残しつつ、上から加工することができます。
ざっと挙げてみただけでもこのようなメリットがあります。
しかく氏のようなシンプルな絵柄ではメリットを感じにくいかもしれませんが、もっと複雑な絵になってくるとレイヤーなしではもう描けない!
表現の幅がかなり広がるのでレイヤー機能をぜひマスターしてみてください。
ペンギンLINEスタンプクリエイター目指して一緒にがんばりましょう!
お読みいただきありがとうございました